In this post, we will explore how to build a prototypical web application using Flask with HyperDex. Specifically, this post will examine how to create a simple discussion board. In a series of blog posts, we'll build up to a discussion forum where people can log in with their OAuth credentials and post comments. Ultimately, we'll build a cryptocurrency exchange backed by HyperDex and Flask.
Flask, of course, is a popular microframework for writing web applications in Python. It uses Werkzeug for WSGI and Jinja2 for templating. HyperDex is a next generation key-value and document store with a wide array of features -- namely a rich API, strong consistency and fault tolerance. For reference, here are the links to the Flask official tutorial and the Hyperdex quick start. With those links at the ready, let's dive right in.
pip install Flask
pip install Flask-WTFwget -O - http://ubuntu.hyperdex.org/hyperdex.gpg.key | apt-key add -
cat >> /etc/apt/sources.list.d/hyperdex.list << EOF
deb [arch=amd64] http://ubuntu.hyperdex.org trusty main
EOF
apt-get update
apt-get install -y hyperdex-warp python-hyperdex-admin-warp python-hyperdex-client-warp3. Create the directories needed for the application. We'll call our application HyperFlaskr and create directories for static files and templates:
mkdir HyperFlaskr HyperFlaskr/static HyperFlaskr/templatesFlask requires the folder structure as described above. It picks up the static images and javascripts from static folder and the Jinja templates from templates.
We will also need some folders to hold the data we are going to serve, as well as metadata about the cluster configuration. The HyperDex coordinator oversees the organization of hyperspaces (the tables we create). Data is the directory that holds the actual data. HyperDex daemons are the workhorses that actually work on storing the data and respond to client requests.
mkdir HyperFlaskr/hyperdex/ HyperFlaskr/hyperdex/data HyperFlaskr/hyperdex/coordinatorcd HyperFlaskr
hyperdex coordinator -f -l 127.0.0.1 -p 1982 --data=hyperdex/coordinator --daemon
cd HyperFlaskr/hyperdex/daemon/
hyperdex daemon -f --listen=127.0.0.1 --listen-port=2012 --coordinator=127.0.0.1 --coordinator-port=1982 --data=hyperdex/data/ --daemonNow that we have the software we need up and running, it's time to initialize HyperDex. Recall that HyperDex is both a key-value and a document store. It does not inherently require a schema to use and can store JSON documents, but when there is a schema present, it can take advantage of it to provide extra performance. Since this application has a well-defined schema, let's take advantage of it and tell HyperDex how our data will be organized.
To do this, let's create a file called db_create.py with the following contents:
import sys
import hyperdex.admin

a = hyperdex.admin.Admin('127.0.0.1', 1982)

if len(sys.argv) == 2 and sys.argv[1] == '--nuke':
    if 'posts' in a.list_spaces():
        a.rm_space('posts')
if 'posts' not in a.list_spaces():
    a.add_space('''
space posts
key
    string id
attributes
    int views,
    string title,
    string body
''')
This specification creates a simple table called posts with key id and attributes views, title, and body. We need to run it to create our database.
python db_create.pyNow that we have our database in place, let’s write a very simple application that can start up a simple Flask server. Place the following code in a file called run.py:
from flask import Flask, request, session, g, redirect, url_for, abort, render_template, flash, make_response
from flask.ext.wtf import Form
from wtforms import StringField, TextAreaField
from wtforms.validators import DataRequired
import hyperdex.client
import uuid

#config
DEBUG = True
#create a simple application
app = Flask(__name__)
app.config.from_object(__name__)
# set the secret key Flask uses for cookie authentication. keep this really secret:
app.secret_key = 'A0Zr98j/3yX R~XHH!jmN]LWX/,?RT'
c = hyperdex.client.Client('127.0.0.1', 1982)

if __name__ == '__main__':
     app.run()
Now run it with
python run.pyWe now have a server running on localhost at port 5000.
Our server isn't very useful because it does not yet render any pages. Let's fix this.
To do this, we'll need to know how to insert and retrieve items from HyperDex. The following cheat sheet might come in handy if you want to get a quick primer on how to do that, and we'll leave the link to the extensive HyperDex documentation here in case you want to explore the full, rich API.
# Search and retrieve all posts
c.search('posts', {})
# Search for posts with title Hello World
c.search('posts', {'title' : 'Hello World'})
# Retrieve the top 100 viewed posts.
c.sorted_search('posts', {}, 'views', 100, 'max')
# Retrieve the specific post with id 1.
c.get('posts', 1)
# Creates a new post with Id 3.
c.put('posts', 3, {'views' : 0, 'title' : "Hello World", 'body' : post_body})
# Atomically increments the view count of a Post with Id 1 by 2.
c.atomic_add('posts', 1, {'views' : 2})
First, let's create a simple form using Flask_WTForms to provide secure CSRF proof form for a user to create a blog entry.
class PostForm(Form):
    title = StringField('title', validators=[DataRequired()])
    body  = TextAreaField('body',  validators=[DataRequired()])
Now, lets write a simple view to display all entries:
@app.route('/')
@app.route('/index', methods=['POST', 'GET'])
def index():
    form = PostForm()
    cur = c.search('posts', {})
    entries = [dict(row) for row in cur]

    if request.method == 'POST':
        if not form.validate_on_submit():
            flash(u'Invalid Input')
            return render_template('show_entries.html', entries=entries, form=form)
        c.put('posts', str(uuid.uuid1()), {'views' : 0, 'title' : str(request.form['title']), 'body' : str(request.form['body'])})
        flash('New entry was successfully posted')
        cur = c.search('posts', {})
        entries = [dict(row) for row in cur]
        return render_template('show_entries.html', entries=entries, form=PostForm(title='', body=''))

return render_template('show_entries.html', entries=entries, form=form)Now, let's add some HTML and CSS to render the UI:
In file HyperFlaskr/templates/layout.html:
<!doctype html>
<title>HyperFlaskr</title>
<link rel=stylesheet type=text/css href="{{ url_for('static', filename='style.css') }}">
<div class='page'>
  <h1>HyperFlaskr</h1>
    {% for message in get_flashed_messages() %}
    <div class='flash'>{{ message }}</div>
    {% endfor %}
{% block body %}{% endblock %}
</div>
In file HyperFlaskr/templates/show_entries.html:
{% extends "layout.html" %}
{% block body %}
    <form action="{{ url_for('index') }}" method='POST' class='add-entry'>
        {{ form.hidden_tag() }}<br/>
        <div>
            <b>Title:</b><br/>
            {{ form.title }}<br/>
            <b>Text:</b><br/>
            {{ form.body }}<br/>
            <br/>
            <input type='submit' value='Share'>
        </div>
    </form>
  <ul class='entries'>
  {% for entry in entries %}
    <li><h2>{{ entry.title }}</h2>{{ entry.body|safe }}</li>
  {% else %}
    <li>No entries here so far</li>
  {% endfor %}
  </ul>
{% endblock %}
Finally, add the following to HyperFlaskr/static/style.css:
body            { font-family: sans-serif; background: #eee; }
a, h1, h2       { color: #377ba8; }
h1, h2          { font-family: 'Georgia', serif; margin: 0; }
h1              { border-bottom: 2px solid #eee; }
h2              { font-size: 1.2em; }

.page           { margin: 2em auto; width: 35em; border: 5px solid #ccc;
                  padding: 0.8em; background: white; }
.entries        { list-style: none; margin: 0; padding: 0; }
.entries li     { margin: 0.8em 1.2em; }
.entries li h2  { margin-left: -1em; }
.add-entry      { font-size: 0.9em; border-bottom: 1px solid #ccc; }
.add-entry dl   { font-weight: bold; }
.metanav        { text-align: right; font-size: 0.8em; padding: 0.3em;
                  margin-bottom: 1em; background: #fafafa; }
.flash          { background: #cee5F5; padding: 0.5em;
                  border: 1px solid #aacbe2; }
.error          { background: #f0d6d6; padding: 0.5em; }
If you want to avoid all this cutting and pasting, you can just download the code bundle for this app.
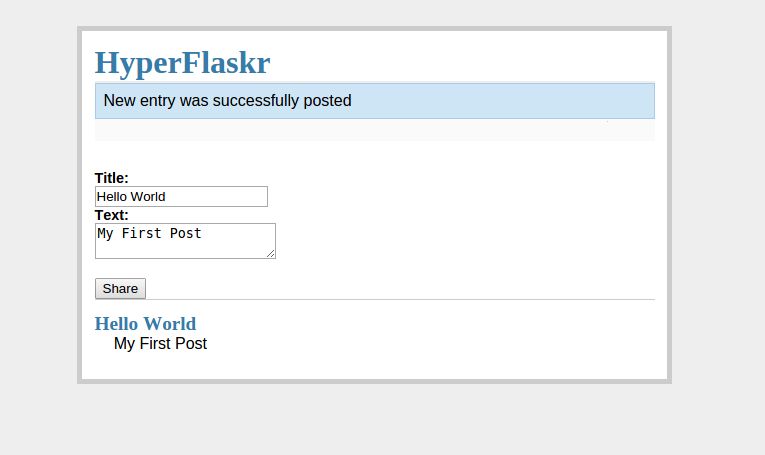
If you reached this point, congratulations! Your web application is off the ground. If you run the server now, we should have a working page through which we can add and delete posts to this simple blog application, albeit, without user login.
Overall, we hope the process was painless. Most of this tutorial was spent on HTML and CSS -- the DB API is, in comparison, fairly straightforward to use.
In the next post in this series, we will see how to handle user login using OAuth.

Co-author of the F13X cryptocurrency trading platform and MEng student at Cornell, headed to Oracle. more...

Co-author of the F13X cryptocurrency trading platform, MEng student at Cornell, headed to Amazon. more...

Hacker and professor at Cornell, with interests that span distributed systems, OSes and networking. Current projects include HyperDex, OpenReplica and the Nexus OS. more...


bitcoin / security / ethereum / hyperdex / release / nosql / selfish-mining / blocksize / dao / surveillance / privacy / mongo / broken / weaver / nsa / meta / leveldb / blockchain / 51% / voting / smart contracts / graph stores / decentralization / bitcoin-ng / vaults / snowden / satoshi / philosophy / mt. gox / mining pools